If you’ve worked with modern APIs—even briefly—you already know that JSON is everywhere. Whether you’re integrating with Microsoft 365 services, pulling data from third-party APIs, or automating internal systems, you’ll almost always be dealing with JSON over HTTP.
In my day-to-day work as a Microsoft 365 administrator and automation consultant, one of the most common tasks I perform is retrieving JSON data from a REST API using PowerShell. It sounds simple at first, but things get more interesting when:
- The API requires authentication (Bearer tokens, API keys, etc.)
- You need to pass custom headers
- You want to handle pagination or errors properly
- You need to process and transform the JSON data afterward
In this tutorial, I will explain how to get JSON Data from a URL in PowerShell (With Custom Headers).
Get JSON Data from a URL in PowerShell
The main command we’ll use is Invoke-RestMethod. There’s also Invoke-WebRequest, but for JSON specifically, Invoke-RestMethod is your friend because it automatically converts the JSON response into PowerShell objects.
Here’s the simplest example:
$response = Invoke-RestMethod -Uri "https://api.example.com/data"That’s it. Seriously. PowerShell grabs the data, converts the JSON, and stores it in $response.
Check out Convert JSON to XML using PowerShell
A Real Example (Without Headers First)
Let’s use a real API that doesn’t need authentication. JSONPlaceholder is perfect for testing:
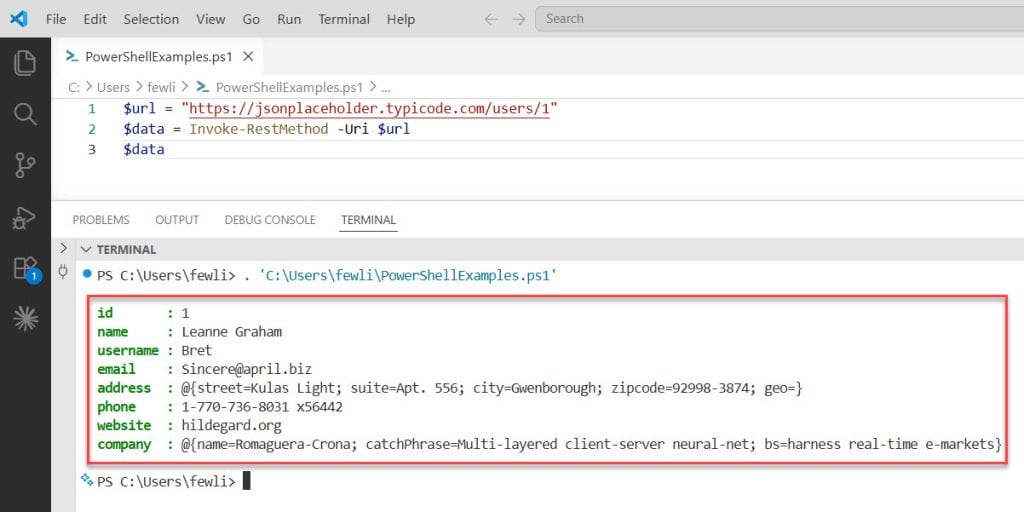
$url = "https://jsonplaceholder.typicode.com/users/1"
$data = Invoke-RestMethod -Uri $url
$data
Run this, and you’ll see user data pop up in your console. PowerShell already converted the JSON into an object you can work with.
You can see the exact output in the screenshot below:
Want just the name?
$data.nameWant the email?
$data.emailHere is the exact output in the screenshot below:
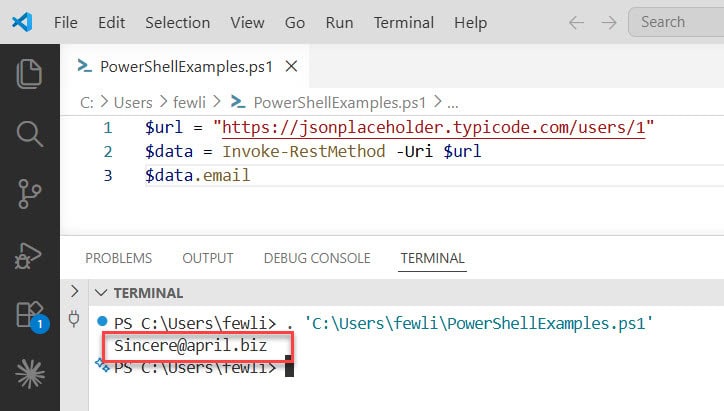
See how easy that is?
Read Create JSON Files with Content Using PowerShell
Now Let’s Add Headers
Here’s where it gets more useful. Most real-world APIs need headers. Authentication tokens, content types, API keys—that sort of thing.
Headers are just key-value pairs that give the server extra information about your request.
Basic Header Example
$headers = @{
    "Content-Type" = "application/json"
}

$response = Invoke-RestMethod -Uri "https://api.example.com/data" -Headers $headers
The @{} syntax creates a hashtable in PowerShell. Think of it as a dictionary where you pair names with values.
Adding an API Key
Many APIs need an API key. Here’s how you’d add one:
$headers = @{
    "Authorization" = "Bearer your-api-key-here"
    "Content-Type" = "application/json"
}

$url = "https://api.example.com/data"
$response = Invoke-RestMethod -Uri $url -Headers $headers
Replace your-api-key-here with your actual key.
Multiple Headers
You can add as many headers as you need:
$headers = @{
    "Authorization" = "Bearer abc123xyz"
    "Content-Type" = "application/json"
    "User-Agent" = "PowerShell Script"
    "Accept" = "application/json"
}

$response = Invoke-RestMethod -Uri $url -Headers $headers
Check out Convert JSON to CSV in PowerShell
Different HTTP Methods
When working with APIs in PowerShell, understanding HTTP methods is very important because each method tells the server what kind of action you want to perform. By default, Invoke-RestMethod uses a GET request, but real-world APIs often require other methods like POST, PUT, and DELETE depending on the operation.
GET Request (Default)
A GET request is the most commonly used method and is used to retrieve data from an API. It does not modify anything on the server—it simply fetches information. In this example, the GET request sends a request to the specified URL along with headers (if required) and returns the response. This is typically used when you want to read data such as user details, posts, or records.
$response = Invoke-RestMethod -Uri $url -Method Get -Headers $headersPOST Request
A POST request is used when you want to send data to the server to create something new. This could be adding a new record, submitting a form, or creating a new resource.
In PowerShell, you usually pass the data using the -Body parameter. Since APIs generally expect data in JSON format, ConvertTo-Json is used to convert a PowerShell hashtable into JSON before sending it. Without this conversion, the API may not understand the data properly.
$headers = @{
    "Content-Type" = "application/json"
}

$body = @{
    title = "My New Post"
    body = "This is the content"
    userId = 1
} | ConvertTo-Json

$response = Invoke-RestMethod -Uri "https://jsonplaceholder.typicode.com/posts" -Method Post -Headers $headers -Body $body
Notice ConvertTo-Json? That converts your PowerShell hashtable into JSON format before sending it.
PUT Request
A PUT request is used to update an existing resource. Unlike POST, which creates new data, PUT typically replaces the entire existing resource with the new data you provide.
In this example, we are updating a post by sending a full object (including id) in JSON format. This ensures the server knows exactly which resource to update and what the new data should be.
$body = @{
    id = 1
    title = "Updated Title"
    body = "Updated content"
    userId = 1
} | ConvertTo-Json

$response = Invoke-RestMethod -Uri "https://jsonplaceholder.typicode.com/posts/1" -Method Put -Headers $headers -Body $body
DELETE Request
A DELETE request is used to remove a resource from the server. It is straightforward—you just specify the resource URL (such as a specific post ID), and the API deletes it. No request body is usually required for DELETE operations.
Here is how to use the DELETE request.
$response = Invoke-RestMethod -Uri "https://jsonplaceholder.typicode.com/posts/1" -Method Delete -Headers $headersCheck out Convert String to JSON in PowerShell
Handling Errors
Things go wrong. Servers timeout. APIs return errors. Your internet drops. Let’s handle that:
try {
    $response = Invoke-RestMethod -Uri $url -Headers $headers -ErrorAction Stop
    Write-Host "Success! Got the data."
} catch {
    Write-Host "Something went wrong: $_"
}
The try/catch block catches errors so your script doesn’t just crash.
Better Error Handling
try {
    $response = Invoke-RestMethod -Uri $url -Headers $headers -ErrorAction Stop
    $response
} catch {
    $statusCode = $_.Exception.Response.StatusCode.value__
    $statusDescription = $_.Exception.Response.StatusDescription

    Write-Host "Error $statusCode: $statusDescription"
    Write-Host "Full error: $_"
}
This gives you the HTTP status code (like 404, 500, etc.) and more details about what failed.
Working With the Response
Once you start getting data back from an API using Invoke-RestMethod, the next step is to actually work with that response—whether that means reading specific values, filtering results, or saving the data for later use.
Accessing Properties
$response = Invoke-RestMethod -Uri "https://jsonplaceholder.typicode.com/users"

# Get all names
$response | ForEach-Object { $_.name }

# Or shorter
$response.name
When you call the API, PowerShell automatically converts the JSON response into objects. This makes it very easy to access properties like name, email, or address.
In the first approach, ForEach-Object loops through each item in the response and prints the name property. This is useful when you want more control or need to perform additional logic.
The second approach ($response.name) is a shortcut. PowerShell automatically extracts the name property from all objects in the collection. It’s cleaner and faster when you just need a single property from all records.
Filtering Data
# Get users from a specific city
$response | Where-Object { $_.address.city -eq "New York" }
Often, you don’t need all the data—you only want specific records. That’s where Where-Object comes in.
In this example, the script filters users based on their city. Since the city is inside a nested object (address), you access it using $_ .address.city. The condition -eq "New York" ensures that only users from that city are returned.
This is especially useful when working with large datasets where you need to narrow down results.
Exporting to CSV
$response | Export-Csv -Path "output.csv" -NoTypeInformationIf you want to store or share the data in a structured format, exporting to CSV is a great option. This command takes the response objects and writes them into a CSV file.
The -NoTypeInformation parameter removes extra metadata that PowerShell adds by default, keeping your file clean and ready to use in tools like Excel.
Saving as JSON File
$response | ConvertTo-Json -Depth 10 | Out-File "data.json"Sometimes you may want to save the data in its original JSON format, especially if you plan to reuse it in another API call or application.
ConvertTo-Json converts the PowerShell objects back into JSON. The -Depth 10 parameter is important because API responses often contain nested objects. Without increasing the depth, PowerShell might truncate deeper levels of data.
Finally, Out-File writes the JSON output to a file, allowing you to store or share it easily.
Check out Write JSON to File in PowerShell
Real-World Example: GitHub API
Let’s pull repository info from GitHub:
$headers = @{
"Accept" = "application/vnd.github.v3+json"
"User-Agent" = "PowerShell"
}
$url = "https://api.github.com/repos/powershell/powershell"
try {
$repo = Invoke-RestMethod -Uri $url -Headers $headers
Write-Host "Repository: $($repo.full_name)"
Write-Host "Stars: $($repo.stargazers_count)"
Write-Host "Forks: $($repo.forks_count)"
Write-Host "Open Issues: $($repo.open_issues_count)"
} catch {
Write-Host "Failed to get repo info: $_"
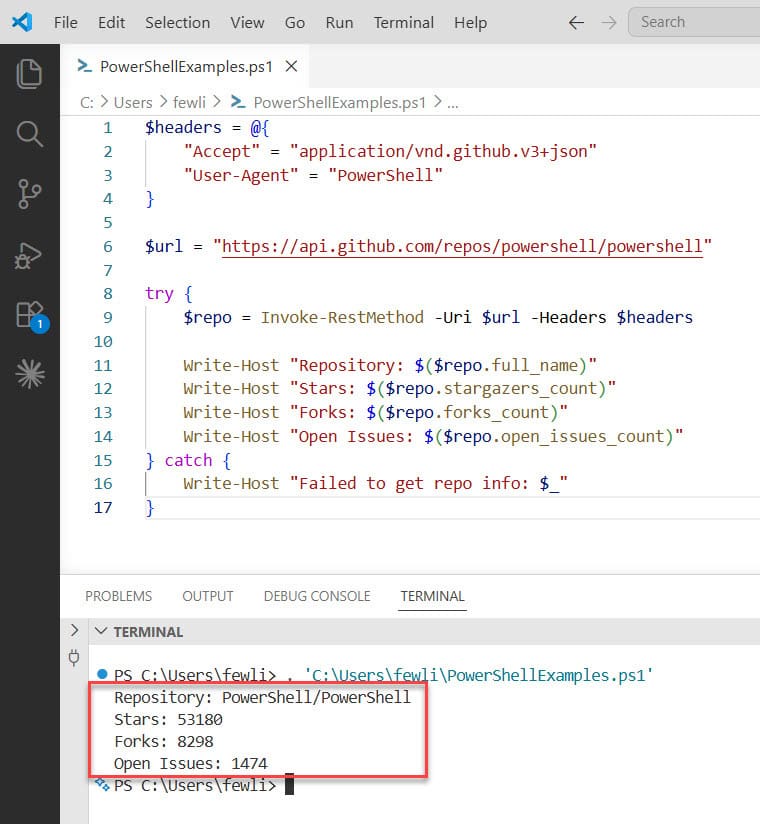
}This grabs PowerShell repository stats from GitHub and displays them.
You can see the exact output in the screenshot below:
Authentication Types
When working with APIs, authentication is required to verify who you are and what you’re allowed to access. Different APIs use different authentication methods, and in PowerShell, this is usually handled by adding the required values in headers or the request URL.
Bearer Token
$headers = @{
    "Authorization" = "Bearer $token"
}
Bearer token authentication is one of the most common methods used in modern APIs. Here, $token is usually generated after logging in or through an authentication service.
The token is added to the Authorization header with the word Bearer in front of it. When you send the request, the server checks this token to verify your identity and permissions.
This method is widely used because it’s secure and works well with systems like OAuth.
Basic Authentication
$username = "your-username"
$password = "your-password"
$base64AuthInfo = [Convert]::ToBase64String([Text.Encoding]::ASCII.GetBytes("${username}:${password}"))

$headers = @{
    "Authorization" = "Basic $base64AuthInfo"
}
Basic authentication uses a username and password combination. However, instead of sending them as plain text, they are encoded into Base64 format.
In this script:
- The username and password are combined using
username:password - Then converted into Base64 using
[Convert]::ToBase64String - Finally, added to the
Authorizationheader with the word Basic
While this method is simple, it is less secure unless used over HTTPS, because Base64 is just encoding—not encryption.
API Key in Header
$headers = @{
    "X-API-Key" = "your-api-key"
}
Some APIs provide an API key that you include in the request header. This key acts like a unique identifier for your application.
In this example, the API expects the key in a custom header called X-API-Key. The exact header name may vary depending on the API.
This method is easy to implement and commonly used for simpler integrations.
API Key in URL (Query Parameter)
$url = "https://api.example.com/data?apikey=your-api-key"
$response = Invoke-RestMethod -Uri $url
Another way APIs accept keys is through the URL as a query parameter. Here, the API key is directly appended to the request URL.
While this approach is straightforward, it is generally less secure because:
- URLs can be logged in browsers or servers
- API keys may get exposed in logs or history
Because of this, many modern APIs prefer headers over query parameters for passing sensitive information.
Check out Read JSON File into Array in PowerShell
Common Issues and Fixes
Now, let me show you some common issues and how to fix them.
SSL Certificate Errors
Sometimes you’ll hit certificate validation issues (especially with internal APIs):
# Use with caution - only for testing/internal APIs
[System.Net.ServicePointManager]::ServerCertificateValidationCallback = {$true}

$response = Invoke-RestMethod -Uri $url -Headers $headers
Don’t use this for public APIs. It’s a security risk.
Timeout Issues
Default timeout is 100 seconds. Change it:
$response = Invoke-RestMethod -Uri $url -Headers $headers -TimeoutSec 300Response is Empty
Check if the API actually returns JSON:
$response = Invoke-WebRequest -Uri $url -Headers $headers
$response.Content  # See raw content
$response.Headers  # Check content-type
Create a Reusable PowerShell Function
This example brings everything together by wrapping your API logic into a reusable PowerShell function. Instead of writing Invoke-RestMethod again and again, you create a single function that can handle different URLs, methods, headers, and request bodies in a clean and consistent way.
Here’s a complete, reusable function:
function Get-JsonFromApi {
    param(
        [string]$Url,
        [hashtable]$Headers = @{},
        [string]$Method = "Get",
        [object]$Body = $null
    )

    try {
        $params = @{
            Uri = $Url
            Method = $Method
            Headers = $Headers
            ErrorAction = "Stop"
        }

        if ($Body) {
            $params.Body = ($Body | ConvertTo-Json)
            $params.Headers["Content-Type"] = "application/json"
        }

        $response = Invoke-RestMethod @params
        return $response
    }
    catch {
        Write-Error "API request failed: $_"
        return $null
    }
}

# Use it
$headers = @{ "Authorization" = "Bearer your-token" }
$data = Get-JsonFromApi -Url "https://api.example.com/data" -Headers $headers
Here, the function is defined with parameters so it’s flexible:
$Url→ The API endpoint you want to call$Headers→ Optional headers (like authentication)$Method→ HTTP method (defaults to GET)$Body→ Optional data for POST/PUT requests
This makes the function reusable for almost any API scenario.
Instead of passing arguments directly, the script builds a parameter object ($params). This is a common PowerShell technique called splatting.
- It keeps the code clean
- Makes it easy to add/remove parameters
- Improves readability
ErrorAction = "Stop" ensures that any error is treated as a real exception (so it can be caught in the catch block).
if ($Body) {
    $params.Body = ($Body | ConvertTo-Json)
    $params.Headers["Content-Type"] = "application/json"
}
This block only runs if a body is provided (for POST/PUT requests).
- The body is converted to JSON using
ConvertTo-Json - The
Content-Typeheader is set toapplication/json
This is important because most APIs expect JSON-formatted data.
$response = Invoke-RestMethod @params
return $response
Here, the function uses splatting (@params) to pass all parameters to Invoke-RestMethod.
The response is then returned, so you can use it outside the function just like any other PowerShell object.
Quick Tips
- Always test with APIs that don’t need authentication first
- Store API keys in secure variables, not in your scripts
- Use
Invoke-RestMethodfor JSON,Invoke-WebRequestfor everything else - Check API documentation for required headers
- Start simple, add complexity as needed
Wrapping Up
In this tutorial, I explained how to get JSON from URLs using PowerShell. We learned:
- Use
Invoke-RestMethod - Add your URL
- Include headers if needed
- Specify the HTTP method
- Handle errors
- Work with the response
Try it out with the examples above. Start with the simple JSONPlaceholder examples, then move to whatever API you actually need to work with. Do let me know in the comments below if you still have any questions.
You may also like the following tutorials:
Bijay Kumar is an esteemed author and the mind behind PowerShellFAQs.com, where he shares his extensive knowledge and expertise in PowerShell, with a particular focus on SharePoint projects. Recognized for his contributions to the tech community, Bijay has been honored with the prestigious Microsoft MVP award. With over 15 years of experience in the software industry, he has a rich professional background, having worked with industry giants such as HP and TCS. His insights and guidance have made him a respected figure in the world of software development and administration. Read more.
