When troubleshooting computers or managing multiple devices in an organization, administrators often need to check important system information, such as the BIOS version. The BIOS version identifies the firmware running on a computer, which is useful for system updates, hardware compatibility checks, and diagnosing device issues.
However, many users are unsure how to quickly find the BIOS version in Windows without restarting the computer or manually entering the BIOS settings. The traditional way involves restarting your computer, pressing a specific key during boot (Del, F2, F10… who knows which one?), and navigating through some dated-looking BIOS interface.
But, PowerShell lets you grab this information in seconds without restarting anything. With a simple PowerShell command, you can quickly retrieve the BIOS version of a Windows computer directly from the system.
In this tutorial, we will learn how to get the BIOS version using PowerShell step by step, using a simple command that works on most Windows devices.
Why Would You Even Need This?
Let me quickly explain why this matters. You might need your BIOS version when:
- Troubleshooting hardware issues – Support teams always ask for this
- Checking for BIOS updates – You need to know your current version first
- Creating system inventory reports – Especially if you manage multiple computers
- Security audits – Some BIOS versions have known vulnerabilities
- Before upgrading hardware – New RAM or processors might need specific BIOS versions
Alright, let’s get into it.
The Simplest Method (One Line of Code)
Open PowerShell and type this:
Get-WmiObject -Class Win32_BIOSHit Enter.
You’ll see something like this in DELL laptops:
SMBIOSBIOSVersion : A12
Manufacturer      : Dell Inc.
Name              : A12
SerialNumber      : 1ABC234
Version           : DELL   - 1072009
The BIOS version is right there in the SMBIOSBIOSVersion field. In this example, it’s “A12”.
That’s it. Really. You just got your BIOS version.
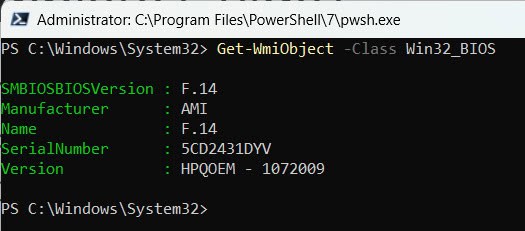
For HP laptops, you will see information like this:
SMBIOSBIOSVersion : F.14
Manufacturer      : AMI
Name              : F.14
SerialNumber      : 5CD2434XXX
Version           : HPQOEM - 1072009
You can see the exact output in the screenshot below:
But let’s be honest – that output shows you a bunch of other stuff too. If you just want the version number and nothing else, keep reading.
Check out Get HP BIOS Settings Using PowerShell
Getting Just the BIOS Version (Nothing Else)
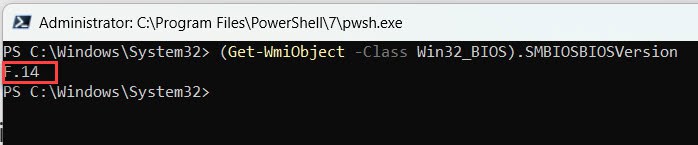
If you want a clean output with just the version number, use this:
(Get-WmiObject -Class Win32_BIOS).SMBIOSBIOSVersionNow you’ll just see:
F.14You can see the exact output in the screenshot below:
Much cleaner, right?
This is perfect when you just need to quickly check the version or copy it to paste somewhere else.
The Modern Way (Using Get-CimInstance)
Here’s something you should know: Get-WmiObject is the old way of doing things. It still works fine, but Microsoft recommends using Get-CimInstance instead for newer systems.
Here’s the modern version:
Get-CimInstance -ClassName Win32_BIOSThe output looks pretty much the same. And if you want just the version:
(Get-CimInstance -ClassName Win32_BIOS).SMBIOSBIOSVersionShould you use Get-WmiObject or Get-CimInstance?
- Use
Get-CimInstanceif you’re on Windows 8/Server 2012 or newer (which you probably are) - Use
Get-WmiObjectif you need to support older systems - Both work fine on modern systems, so don’t stress about it too much
Read How to Get HP BIOS Version Using PowerShell
Getting More BIOS Information
Sometimes you need more than just the version number. Here’s how to see all available BIOS properties in a nicer format:
Get-CimInstance -ClassName Win32_BIOS | Format-List *This shows you everything:
- BIOS version
- Manufacturer
- Release date
- Serial number
- BIOS characteristics
- And more
The Format-List * part tells PowerShell to show all properties in a list format instead of a table.
Checking BIOS Version on Remote Computers
Now this is where PowerShell really shines. You can check the BIOS version on other computers in your network without leaving your desk.
Here’s how:
Get-CimInstance -ClassName Win32_BIOS -ComputerName "PC-NAME"Just replace “PC-NAME” with the actual computer name.
Important things to note:
- You need admin rights on the remote computer
- Windows Firewall might block this (more on that in a bit)
- The remote computer needs to be on and connected to the network
Checking Multiple Computers at Once
Want to check several computers? Create an array of computer names:
$computers = "PC-01", "PC-02", "PC-03"
foreach ($computer in $computers) {
    Get-CimInstance -ClassName Win32_BIOS -ComputerName $computer | Select-Object PSComputerName, SMBIOSBIOSVersion
}
This loops through each computer and shows you the computer name and BIOS version.
Reading Computer Names from a File
If you have a lot of computers to check, put the names in a text file (one per line) and use this:
$computers = Get-Content "C:\computers.txt"
foreach ($computer in $computers) {
    Get-CimInstance -ClassName Win32_BIOS -ComputerName $computer | Select-Object PSComputerName, SMBIOSBIOSVersion
}
Check out Check if a Process is Running in PowerShell
Creating a Nice Report
Let’s say you want to create a proper report with selected information. Here’s a practical example:
Get-CimInstance -ClassName Win32_BIOS | Select-Object `
    @{Name="Computer";Expression={$env:COMPUTERNAME}},
    Manufacturer,
    SMBIOSBIOSVersion,
    @{Name="ReleaseDate";Expression={$_.ReleaseDate}}
This creates a table with:
- Computer name
- BIOS manufacturer
- BIOS version
- Release date
You can export this to a CSV file:
Get-CimInstance -ClassName Win32_BIOS | Select-Object `
    @{Name="Computer";Expression={$env:COMPUTERNAME}},
    Manufacturer,
    SMBIOSBIOSVersion,
    ReleaseDate | Export-Csv -Path "C:\BIOSInfo.csv" -NoTypeInformation
Now you have a CSV file you can open in Excel.
Common Issues and How to Fix Them
“Get-WmiObject: Access Denied”
This usually means you don’t have admin rights. Right-click PowerShell and select “Run as Administrator”.
Remote Access Not Working
If you can’t connect to remote computers, check these things:
- Firewall rules: Run this on the remote computer:
Set-NetFirewallRule -DisplayGroup "Windows Management Instrumentation (WMI)" -Enabled True- WinRM service: Make sure it’s running:
Enable-PSRemoting -Force- Network connectivity: Can you ping the computer?
Getting Null or Empty Results
Sometimes the BIOS version field might be empty. Try checking the Version property instead:
(Get-CimInstance -ClassName Win32_BIOS).VersionDifferent manufacturers populate different fields.
Saving Your Script for Future Use
If you find yourself checking BIOS versions regularly, save this as a PowerShell script.
Create a new file called Get-BIOSVersion.ps1 and add:
param(
    [string]$ComputerName = $env:COMPUTERNAME
)

$bios = Get-CimInstance -ClassName Win32_BIOS -ComputerName $ComputerName
Write-Host "Computer: $ComputerName" -ForegroundColor Green
Write-Host "BIOS Version: $($bios.SMBIOSBIOSVersion)"
Write-Host "Manufacturer: $($bios.Manufacturer)"
Write-Host "Release Date: $($bios.ReleaseDate)"
Now you can run it like this:
.\Get-BIOSVersion.ps1Or check a remote computer:
.\Get-BIOSVersion.ps1 -ComputerName "PC-NAME"Quick Reference Commands
Here’s a cheat sheet of the commands we covered:
Basic BIOS info:
Get-CimInstance -ClassName Win32_BIOSJust the version:
(Get-CimInstance -ClassName Win32_BIOS).SMBIOSBIOSVersionAll properties:
Get-CimInstance -ClassName Win32_BIOS | Format-List *Remote computer:
Get-CimInstance -ClassName Win32_BIOS -ComputerName "PC-NAME"Export to CSV:
Get-CimInstance -ClassName Win32_BIOS | Export-Csv -Path "C:\bios.csv" -NoTypeInformationWrapping Up
Getting your BIOS version through PowerShell is way faster than rebooting and fumbling through BIOS menus. Plus, once you know these commands, you can check BIOS versions across your entire network in minutes.
Start with the simple one-liner. As you get comfortable, try the remote computer stuff and creating reports. That’s where PowerShell really saves you time.
The best part? You don’t need to be a PowerShell expert to use any of this. Just copy, paste, and modify the computer names as needed.
You may also like the following tutorial:
- How to Kill a Process If It Is Running in PowerShell?
- Find and Remove Stale Computer Objects in Active Directory with PowerShell
- How to Find Public Folder Paths in PowerShell?
Bijay Kumar is an esteemed author and the mind behind PowerShellFAQs.com, where he shares his extensive knowledge and expertise in PowerShell, with a particular focus on SharePoint projects. Recognized for his contributions to the tech community, Bijay has been honored with the prestigious Microsoft MVP award. With over 15 years of experience in the software industry, he has a rich professional background, having worked with industry giants such as HP and TCS. His insights and guidance have made him a respected figure in the world of software development and administration. Read more.
