
I’ve seen this problem a lot in file server cleanup work: one folder fills up with reports, and the destination folder already has some of those files. If you move everything blindly, you overwrite good files or create a messy duplicate situation.
A simple PowerShell script solves it cleanly. You check whether each file already exists in the destination, then move only the ones that are safe to move.
In this tutorial, I explained how to move files from one folder to another if they do not exist in PowerShell.
Why This Script Matters
This is a classic file-automation task, so the best fit is a practical how-to guide. The goal is to move files from one folder to another if not exists, without clobbering anything already in place.
I usually build this kind of script for shared folders, download folders, and report drops on Windows servers. The pattern stays the same: read the source folder, compare file names, and move only the missing ones.
The script should do three things well:
- Look at every file in the source folder.
- Check whether a file with the same name already exists in the destination.
- Move only files that do not already exist there.
That makes the process safe, predictable, and easy to test.
Basic Move Files PowerShell Script
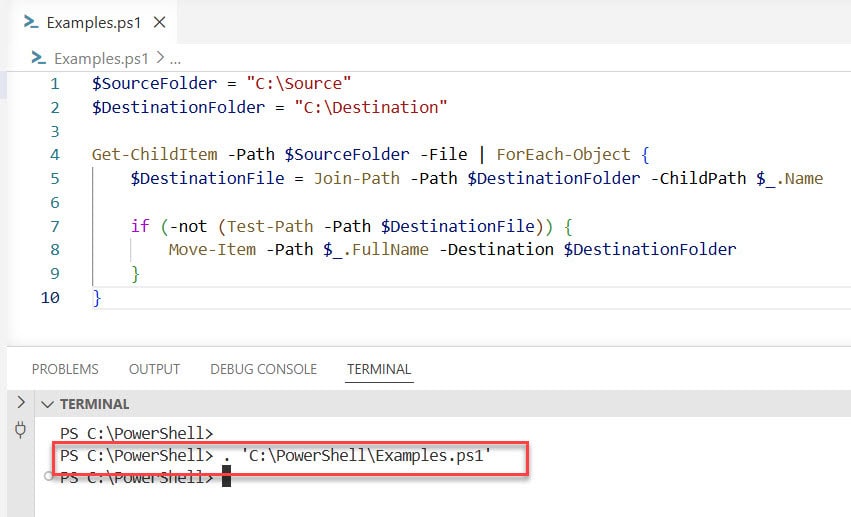
Here is the simplest version of the script:
$SourceFolder = "C:\Source"
$DestinationFolder = "C:\Destination"

Get-ChildItem -Path $SourceFolder -File | ForEach-Object {
    $DestinationFile = Join-Path -Path $DestinationFolder -ChildPath $_.Name

    if (-not (Test-Path -Path $DestinationFile)) {
        Move-Item -Path $_.FullName -Destination $DestinationFolder
    }
}
Get-ChildItem is the cmdlet that lists files and folders. I used the -File parameter so the script handles files only, not subfolders.
ForEach-Object is the pipeline cmdlet that processes one item at a time. Join-Path builds the full destination file path safely, and Test-Path checks whether that file already exists.
You can see the exact output in the screenshot below:
How It Works
Here is the same script in plain language:
$SourceFolderstores the folder you want to read from.$DestinationFolderstores the folder you want to move files into.Get-ChildItemgets each file from the source.$_represents the current file in the pipeline.Join-Pathcombines the destination folder and file name.Test-Pathchecks whether that exact file already exists.Move-Itemmoves the file only when the destination file is missing.
That is the safest version for a beginner because it avoids overwriting files.
Safer Version With Logging
When I automate file moves in production, I usually add a little logging. That helps me verify what moved and what got skipped.
$SourceFolder = "C:\Source"
$DestinationFolder = "C:\Destination"
$LogFile = "C:\Logs\FileMove.log"

Get-ChildItem -Path $SourceFolder -File | ForEach-Object {
    $DestinationFile = Join-Path -Path $DestinationFolder -ChildPath $_.Name

    if (Test-Path -Path $DestinationFile) {
        Add-Content -Path $LogFile -Value "Skipped: $($_.FullName) already exists."
    }
    else {
        Move-Item -Path $_.FullName -Destination $DestinationFolder
        Add-Content -Path $LogFile -Value "Moved: $($_.FullName)"
    }
}
Add-Content appends text to a log file. I like this approach because it gives you a simple audit trail without adding much complexity.
Add A Dry Run First
Before you move anything real, test the logic with -WhatIf. This parameter tells PowerShell what would happen without actually changing files.
Get-ChildItem -Path $SourceFolder -File | ForEach-Object {
    $DestinationFile = Join-Path -Path $DestinationFolder -ChildPath $_.Name

    if (-not (Test-Path -Path $DestinationFile)) {
        Move-Item -Path $_.FullName -Destination $DestinationFolder -WhatIf
    }
}
This is the version I use first in any new environment. It lets you confirm the script logic before you let it touch real data.
Pro Tip: I’ve found that most file-move mistakes come from matching only part of the name. Always compare the full file name, and test with a few real samples before you automate the whole folder.
Move Only New Files Recursively
If your source folder has subfolders, you can add -Recurse. That tells PowerShell to scan child folders too.
Get-ChildItem -Path $SourceFolder -File -Recurse | ForEach-Object {
    $DestinationFile = Join-Path -Path $DestinationFolder -ChildPath $_.Name

    if (-not (Test-Path -Path $DestinationFile)) {
        Move-Item -Path $_.FullName -Destination $DestinationFolder
    }
}
This works well when you want one flat destination folder. If you need to preserve subfolder structure, the script needs a different approach.
Handle Duplicate Names Better
Sometimes two files share the same name but contain different content. In that case, skipping the file may not be enough.
You can rename the file before moving it, or add a timestamp to the destination name. That avoids collisions and keeps both versions.
Get-ChildItem -Path $SourceFolder -File | ForEach-Object {
    $NewName = "{0}_{1}{2}" -f $_.BaseName, (Get-Date -Format "yyyyMMddHHmmss"), $_.Extension
    $DestinationFile = Join-Path -Path $DestinationFolder -ChildPath $NewName

    if (-not (Test-Path -Path $DestinationFile)) {
        Move-Item -Path $_.FullName -Destination $DestinationFile
    }
}
BaseName gives you the file name without the extension. Extension gives you .txt, .csv, or whatever the file type uses.
Things to Keep in Mind
- Test with
-WhatIffirst. This helps you confirm behavior before the script changes real files. - Use full paths. Relative paths break easily when you run the script from another folder.
- Decide how to handle duplicates. Skipping, renaming, or logging each one are all valid choices.
- Check permissions early. The account running the script must read the source and write to the destination.
- Log important actions. A small log file makes troubleshooting much easier later.
- Watch recursion carefully.
-Recursecan pull in more files than you expect.
Frequently Asked Questions
How do I move files from one folder to another if not exists in PowerShell?
Use Get-ChildItem to list source files, Test-Path to check the destination, and Move-Item to move only missing files. That gives you a clean, safe file move script.
Does this overwrite files already in the destination?
Not if you check with Test-Path first. The script skips files that already exist, so you avoid accidental overwrites.
Can I use this in Windows PowerShell 5.1 and PowerShell 7?
Yes, this approach works in both. The cmdlets used here are core PowerShell features, so you do not need a special module.
How do I test the script safely?
Add -WhatIf to Move-Item first. That shows what would happen without moving anything, which is the safest way to test.
Can I move files only if the destination folder does not have the same name?
Yes, that is exactly what Test-Path checks. It compares the destination file path, so the script moves only missing file names.
How do I log skipped files and moved files?
Use Add-Content to write a line to a log file inside the if and else blocks. That gives you a simple record of what happened during the run.
This script gives you a safe way to move files from one folder to another if not exists, without overwriting anything important. Start small, test carefully, and then automate more once you’re confident. I hope you found this article helpful.
You May Also Like
- Copy files from one folder to another in PowerShell
- Move a file to a folder in PowerShell
- Check if a file exists in PowerShell
- PowerShell Try Catch examples
- Write to log file in PowerShell

Bijay Kumar is an esteemed author and the mind behind PowerShellFAQs.com, where he shares his extensive knowledge and expertise in PowerShell, with a particular focus on SharePoint projects. Recognized for his contributions to the tech community, Bijay has been honored with the prestigious Microsoft MVP award. With over 15 years of experience in the software industry, he has a rich professional background, having worked with industry giants such as HP and TCS. His insights and guidance have made him a respected figure in the world of software development and administration. Read more.