I have lost count of how many times I have needed a favicon at short notice and ended up on some random online converter, uploading a company logo I probably shouldn’t be handing to a stranger’s server. It works, but it always feels wrong.
The confusing part is that Windows has no built-in ICO cmdlet. There is no ConvertTo-Icon. So when people search for how to convert PNG to ICO using PowerShell, they find three answers that all look different, and two of them quietly produce a single blurry frame.
In this tutorial, I will show you how to convert PNG to ICO using PowerShell with nothing but .NET classes that already ship with Windows. No modules, no admin rights, no uploads. We will build a working batch converter around one small folder of sample images.
I will also explain why the popular one-line trick gives you a 32×32-only icon, and how to write a proper multi-resolution ICO instead.
Key Takeaways
- PowerShell has no native ICO cmdlet, so every method here calls the
System.Drawingassembly built into Windows. - The quick
Bitmap.Savemethod is fine for throwaway icons but produces one frame with poor small-size scaling. - Writing the ICO header yourself gives real multi-resolution icons at 16, 32, 48, 64 and 256 pixels.
- Always dispose of bitmaps and streams, or your source PNG stays locked until the session closes.
- Use
-ErrorAction Stopinside try/catch, because non-terminating errors slip straight pastcatch.
Prerequisites
- Windows PowerShell 5.1 or PowerShell 7.4+, running on Windows.
- The
System.Drawingassembly, already present on Windows 11. Confirm withAdd-Type -AssemblyName System.Drawing. - No external modules and no elevated session required.
- If you save this as a
.ps1, runGet-ExecutionPolicy. If it returnsRestricted, useSet-ExecutionPolicy -Scope CurrentUser -ExecutionPolicy RemoteSigned. - Write access to your chosen output folder.
What Converting PNG to ICO Actually Does
An ICO file is not a single image. It is a container: a 6-byte header, one 16-byte directory entry per image, then the image payloads themselves.
Here is the detail that makes this easy. Since Windows Vista, an ICO entry may hold a raw PNG stream verbatim. So converting PNG to ICO is mostly a packaging job, not a re-encode.
Use it when:
- You need a favicon, shortcut icon, or tray icon from an existing PNG.
- You are generating icons as part of a build or deployment script.
- Company artwork must not leave your machine.
Don’t use it when:
- Your source PNG is small. Upscaling to 256 pixels looks terrible.
- You need hand-tuned 16×16 pixel art. Automated downscaling loses fine detail.
- You are on Linux or macOS, where
System.Drawinggraphics calls are unsupported.
Check out Convert SHA256 to MD5 in PowerShell
The Short Answer
If you only read one section, this is it. Load the PNG, resize it, and save with the ICO encoder:
Add-Type -AssemblyName System.Drawing
$SourceImage = [System.Drawing.Image]::FromFile("C:\IconLab\Source\logo-primary.png")
$IconBitmap = New-Object System.Drawing.Bitmap -ArgumentList $SourceImage, 32, 32
$IconBitmap.Save("C:\IconLab\Output\logo-primary.ico", [System.Drawing.Imaging.ImageFormat]::Icon)
$IconBitmap.Dispose()
$SourceImage.Dispose()That is a working single-size icon in five lines. Read on for the multi-size version, which is what you actually want for anything user-facing.
Syntax
There is no cmdlet here, so the syntax is the .NET surface we call.
[System.Drawing.Image]::FromFile([string] $Filename)
New-Object System.Drawing.Bitmap -ArgumentList <Image>, <Width>, <Height>
<Bitmap>.Save([string] $Filename, [System.Drawing.Imaging.ImageFormat] $Format)
New-Object System.IO.BinaryWriter -ArgumentList <Stream>
| Parameter | Type | Required? | What it does |
|---|---|---|---|
$Filename | String | Yes | Full path to the source PNG. Relative paths resolve against the .NET working directory, not your PowerShell location. |
Image | System.Drawing.Image | Yes | The loaded source used as the drawing source for the resize. |
Width / Height | Int32 | Yes | Target pixel dimensions for that frame. |
$Format | ImageFormat | Yes | Output encoder. Use Png for embedded frames, Icon for the quick path. |
Stream | System.IO.Stream | Yes | Destination FileStream that receives the ICO bytes. |
Note: None of these .NET methods accept pipeline input. All the pipeline work in this article happens in Get-ChildItem feeding a function with a process block.
Check out How to Convert JPG to PDF Using PowerShell
Setting Up the Example Data
Below I have a folder of five PNG logos, the kind of set you get handed after a rebrand, and every example reuses exactly these files.
New-Item -Path "C:\IconLab\Source" -ItemType Directory -Force | Out-Null
New-Item -Path "C:\IconLab\Output" -ItemType Directory -Force | Out-Null
Add-Type -AssemblyName System.Drawing
$Bitmap = New-Object System.Drawing.Bitmap -ArgumentList 256, 256
$Graphics = [System.Drawing.Graphics]::FromImage($Bitmap)
$Graphics.Clear([System.Drawing.Color]::SteelBlue)
$Graphics.Dispose()
$Bitmap.Save("C:\IconLab\Source\logo-primary.png", [System.Drawing.Imaging.ImageFormat]::Png)
$Bitmap.Dispose()Repeat those six lines for the remaining four names and sizes in the table below, changing the color and dimensions each time.
| File | Source size | Colour | Intended use |
|---|---|---|---|
| logo-primary.png | 256×256 | SteelBlue | Desktop shortcut icon |
| logo-mono.png | 256×256 | DimGray | Disabled-state icon |
| icon-app.png | 128×128 | SeaGreen | Tray icon |
| icon-alert.png | 64×64 | Firebrick | Notification icon |
| favicon-source.png | 512×512 | DarkOrchid | Website favicon |
How to Convert PNG to ICO Using PowerShell
I will cover both methods here, because which one you want depends entirely on who sees the icon.
The quick single-size method
- Open PowerShell as your normal user. No elevation needed.
- Load the assembly with
Add-Type. - Load
logo-primary.png, resize into a 32×32 bitmap, save with theIconencoder. - Dispose of both objects.
Add-Type -AssemblyName System.Drawing
$SourcePath = "C:\IconLab\Source\logo-primary.png"
$TargetPath = "C:\IconLab\Output\logo-primary.ico"
$SourceImage = [System.Drawing.Image]::FromFile($SourcePath)
$IconBitmap = New-Object System.Drawing.Bitmap -ArgumentList $SourceImage, 32, 32
$IconBitmap.Save($TargetPath, [System.Drawing.Imaging.ImageFormat]::Icon)
$IconBitmap.Dispose()
$SourceImage.Dispose()
Get-Item -Path $TargetPath | Select-Object -Property Name, Length, LastWriteTimeHere is the output:
Name Length LastWriteTime
---- ------ -------------
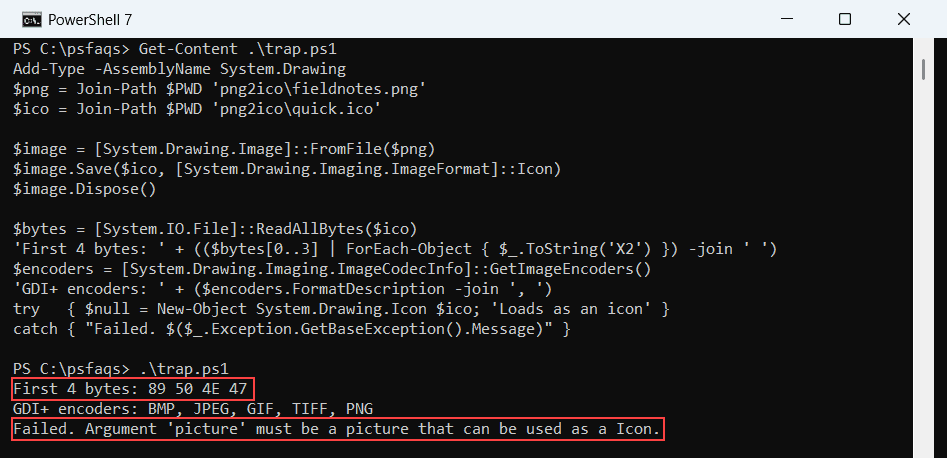
logo-primary.ico 519 25-08-2026 21:24:11I used 32 rather than 256 deliberately. The GDI+ Icon encoder has a long-standing habit of producing unusable output above 255 pixels, because the ICO directory stores each dimension in a single byte.
You can see the exact output in the screenshot below:

The multi-size method
This is the version I actually keep. Instead of asking GDI+ to build an icon, we encode several PNG frames and assemble the container ourselves.
Add-Type -AssemblyName System.Drawing
$SourcePath = "C:\IconLab\Source\favicon-source.png"
$TargetPath = "C:\IconLab\Output\favicon.ico"
$IconSizes = @(16, 32, 48, 64, 256)
try {
$SourceImage = [System.Drawing.Image]::FromFile($SourcePath)
$FrameList = [System.Collections.Generic.List[byte[]]]::new()
foreach ($Size in $IconSizes) {
$Frame = New-Object System.Drawing.Bitmap -ArgumentList $SourceImage, $Size, $Size
$Buffer = New-Object System.IO.MemoryStream
$Frame.Save($Buffer, [System.Drawing.Imaging.ImageFormat]::Png)
$FrameList.Add($Buffer.ToArray())
$Buffer.Dispose()
$Frame.Dispose()
}
$FileStream = [System.IO.File]::Create($TargetPath)
$Writer = New-Object System.IO.BinaryWriter -ArgumentList $FileStream
$Writer.Write([int16]0) # reserved
$Writer.Write([int16]1) # type 1 = icon
$Writer.Write([int16]$FrameList.Count) # frame count
$Offset = 6 + (16 * $FrameList.Count)
for ($Index = 0; $Index -lt $FrameList.Count; $Index++) {
$Dimension = $IconSizes[$Index]
$Writer.Write([byte]($Dimension -band 0xFF)) # 256 stores as 0
$Writer.Write([byte]($Dimension -band 0xFF))
$Writer.Write([byte]0) # palette count
$Writer.Write([byte]0) # reserved
$Writer.Write([int16]1) # colour planes
$Writer.Write([int16]32) # bits per pixel
$Writer.Write([int32]$FrameList[$Index].Length)
$Writer.Write([int32]$Offset)
$Offset += $FrameList[$Index].Length
}
foreach ($Frame in $FrameList) { $Writer.Write($Frame) }
$Writer.Flush()
$Writer.Dispose()
$FileStream.Dispose()
$SourceImage.Dispose()
Get-Item -Path $TargetPath -ErrorAction Stop | Select-Object -Property Name, Length
}
catch {
Write-Error "ICO build failed: $($_.Exception.Message)"
}Name Length
---- ------
favicon.ico 14462Here is the exact output in the screenshot below:

How does this command work?
Add-Type -AssemblyName System.Drawingloads the GDI+ wrapper. Without it,[System.Drawing.Image]is an unresolvable type in PowerShell 7.FromFilereads the PNG into memory and holds a file lock until disposed.New-Object System.Drawing.Bitmap -ArgumentList $SourceImage, $Size, $Sizeuses the resizing constructor, redrawing the source at the new dimensions.[System.Collections.Generic.List[byte[]]]::new()gives a growable list. I use this rather than$FrameList += $Frame, which rebuilds the whole array on every iteration.- Each frame is encoded straight into a
MemoryStream, so no temporary files touch disk. $Writer.Write([int16]1)sets the resource type. Type 1 is an icon, type 2 would be a cursor.$Offset = 6 + (16 * $FrameList.Count)calculates where payloads begin: 6 header bytes plus 16 bytes per directory entry.$Dimension -band 0xFFmasks 256 down to 0, which is the spec’s way of encoding a 256-pixel frame in one byte. Miss this and the write throws.-ErrorAction StoponGet-Itemconverts a non-terminating error into a terminating one, socatchactually sees it.
Right-click the finished favicon.ico, open Properties, and Windows should render it crisply at every preview size.
Pro Tip: Never use Write-Host to report results from a converter like this. Return objects or use Write-Output, so the caller can pipe results into Export-Csv or Where-Object. Write-Host writes to the display and is invisible to the pipeline.
Read Get Folder Size in PowerShell Including Subfolders
How to Convert a Whole Folder of PNGs to ICO
Now let us run that logic across all five sample files. Wrap the builder in an advanced function and let the pipeline feed it.
- Turn the header-writing block into a function with a
processblock. - Enumerate the source folder with
Get-ChildItem -Filter "*.png". - Pipe straight into the function.
- Return one summary object per conversion.
function Convert-PngToIcon {
[CmdletBinding()]
param(
[Parameter(Mandatory = $true, ValueFromPipelineByPropertyName = $true)]
[string] $FullName,
[Parameter(Mandatory = $true)]
[string] $OutputFolder,
[Parameter(Mandatory = $false)]
[int[]] $IconSizes = @(16, 32, 48, 64, 256)
)
process {
Add-Type -AssemblyName System.Drawing
$BaseName = [System.IO.Path]::GetFileNameWithoutExtension($FullName)
$TargetPath = Join-Path -Path $OutputFolder -ChildPath "$BaseName.ico"
try {
$SourceImage = [System.Drawing.Image]::FromFile($FullName)
$UsableSizes = $IconSizes | Where-Object { $_ -le $SourceImage.Width }
# ... frame encoding and ICONDIR writing block from above,
# ... using $UsableSizes in place of $IconSizes ...
[pscustomobject]@{
Source = $BaseName
IconPath = $TargetPath
Frames = $UsableSizes.Count
SizeKB = [math]::Round((Get-Item -Path $TargetPath -ErrorAction Stop).Length / 1KB, 1)
Status = "Converted"
}
}
catch {
[pscustomobject]@{
Source = $BaseName
IconPath = $TargetPath
Frames = 0
SizeKB = 0
Status = "Failed: $($_.Exception.Message)"
}
}
}
}
Get-ChildItem -Path "C:\IconLab\Source" -Filter "*.png" -File |
Convert-PngToIcon -OutputFolder "C:\IconLab\Output" |
Format-Table -AutoSizeSource IconPath Frames SizeKB Status
------ -------- ------ ------ ---------
favicon-source C:\IconLab\Output\favicon-source.ico 5 34.1 Converted
icon-alert C:\IconLab\Output\icon-alert.ico 3 1.6 Converted
icon-app C:\IconLab\Output\icon-app.ico 4 2.9 Converted
logo-mono C:\IconLab\Output\logo-mono.ico 5 12.4 Converted
logo-primary C:\IconLab\Output\logo-primary.ico 5 12.8 ConvertedHow does this command work?
[CmdletBinding()]makes this an advanced function, which is what gives you-Verboseand proper-ErrorActionsupport for free.ValueFromPipelineByPropertyName = $trueon$FullNameis whyGet-ChildItembinds directly, since FileInfo objects already expose aFullNameproperty.- The
processblock runs once per piped object, so the function streams instead of waiting for the whole collection. -Filter "*.png"filters at the provider level rather than pulling every file into PowerShell and discarding it later.$IconSizes | Where-Object { $_ -le $SourceImage.Width }skips any frame larger than the source, which is why the 64pxicon-alert.pngproduced only three frames.- Returning a
[pscustomobject]from both branches means one failure never breaks the run.
Caution: [System.IO.File]::Create() overwrites silently, with no prompt and no -WhatIf. Preview first with Get-ChildItem -Path "C:\IconLab\Output" -Filter "*.ico" | Remove-Item -WhatIf.
Check out Convert HTML to PDF in PowerShell
Bitmap.Save vs Manual ICO Writing Comparison
| Aspect | Bitmap.Save with ImageFormat::Icon | Manual ICONDIR writer |
|---|---|---|
| Lines of code | 5 | ~30 |
| Frames produced | 1 | As many as you list |
| Max usable size | Unreliable above 255px | 256px fully supported |
| Alpha channel | Often flattened | Preserved via embedded PNG |
| Quality at 16px | Blurry | Sharp, purpose-scaled |
| File size | Smaller | Typically 10–40 KB |
Bitmap.Save is genuinely fine for a throwaway shortcut icon nobody will look at closely. The manual writer wins the moment the icon is user-facing, because browsers pull the 16px frame for tabs and the 32px frame for bookmarks, and a single downscaled 256px image looks soft in both.
Decision rule: use Bitmap.Save for a quick single-size icon, and the manual ICONDIR writer for anything a user or browser will actually see.
Performance and Scripting Best Practices
Filtering left is the biggest win. -Filter "*.png" pushes the pattern down to the filesystem provider, while Where-Object { $_.Extension -eq ".png" } retrieves every file object first and throws most away.
The other trap is $Array += $Item inside a loop. .NET arrays are fixed length, so each += allocates a new array and copies everything across.
- Use
-Filterfor wildcard patterns, and reserveWhere-Objectfor property logic like$_.Length -gt 10KB. - Replace
+=with[System.Collections.Generic.List[T]]and.Add(). - Dispose every
Bitmap,Graphics,MemoryStreamandBinaryWriter, since GDI+ handles are unmanaged. - Add
-FiletoGet-ChildItemso directories never enter the pipeline. - Emit
[pscustomobject]results rather than formatted strings, soExport-Csvstill works downstream.
Pro Tip: If you convert hundreds of files in one session, call [System.GC]::Collect() once at the end, never inside the loop. Forcing collection per iteration costs more than the memory it frees.
Read PowerShell Convert HTML to Plain Text
Compatibility Notes
| Behaviour | Windows PowerShell 5.1 | PowerShell 7.4+ (Windows) | PowerShell 7.4+ (Linux/macOS) |
|---|---|---|---|
Add-Type -AssemblyName System.Drawing | Loads | Loads via System.Drawing.Common | Loads, but graphics calls throw |
[System.Drawing.Image]::FromFile | Supported | Supported | PlatformNotSupportedException |
| Bitmap resize constructor | Supported | Supported | Not supported |
ImageFormat::Icon encoder | Supported | Supported | Not supported |
BinaryWriter header writing | Supported | Supported | Supported |
[List[byte[]]]::new() | Supported | Supported | Supported |
Note: System.Drawing graphics operations have been Windows-only since .NET 6. The header-writing half is fully cross-platform, so on Linux you would swap the resize step for another imaging library and keep the rest.
Common Errors and How to Fix Them
| Error message | Why it happens | The fix |
|---|---|---|
"...logo.png is not a valid path." | Path missing, or a relative path resolved somewhere unexpected | Use a full path, or (Resolve-Path -Path $File).Path |
Unable to find type [System.Drawing.Image]. | Assembly never loaded in this session | Run Add-Type -AssemblyName System.Drawing first |
A generic error occurred in GDI+. | Output folder missing, or file locked by Explorer’s preview pane | Create the folder first and close the preview window |
The process cannot access the file ... used by another process. | An earlier FromFile was never disposed | Call .Dispose() on every Image and Bitmap, ideally in finally |
Cannot convert argument "0", with value: "256" ... to type "System.Byte" | 256 will not fit in the ICONDIRENTRY width byte | Mask it: [byte]($Dimension -band 0xFF) |
System.OutOfMemoryException | Large images loaded repeatedly without disposal | Dispose per iteration and avoid += growth |
Export-Csv : Cannot bind argument to parameter 'InputObject' because it is null. | Nothing was pending, so $Results was empty | Guard with if ($Results) { ... } |
Things to Keep in Mind
- Dispose everything. Leaked GDI+ handles are the number one cause of “file in use” errors in image scripts.
- 256 is the ICO ceiling. Width and height each occupy one byte, so nothing larger can be described.
- Never upscale. Filter your size list against the source width, or a 64px logo turns to mush at 256.
- Execution policy bites saved scripts, not pasted commands. If it runs interactively but fails as a
.ps1, checkGet-ExecutionPolicy -List. -WhatIfdoes not exist on .NET methods. Only cmdlets support it, so guard overwrites withTest-Path.- Non-terminating errors skip
catch. Add-ErrorAction Stopwherever failure should abort the block. - No admin rights are needed, provided you can write to the output folder.
Frequently Asked Questions
Do I need to install anything to convert PNG to ICO using PowerShell?
No. System.Drawing ships with Windows, and every example here runs on a stock Windows 11 machine without modules or elevation.
Why does my icon look blurry in the browser tab?
You almost certainly produced a single large frame. Browsers downscale it themselves, and the result is soft. Use the multi-size writer so a purpose-scaled 16px frame exists.
Can I convert JPG or BMP the same way?
Yes. [System.Drawing.Image]::FromFile handles JPG, BMP, GIF and TIFF too. Only change the -Filter value in Get-ChildItem.
Why is 256 written as 0 in the header?
The ICONDIRENTRY stores width and height in one byte each, so the maximum literal value is 255. The spec defines 0 as meaning 256.
Does this preserve transparency?
Yes, with the manual writer, because each frame is an embedded 32-bit PNG. The quick Bitmap.Save path frequently flattens alpha.
Can I run this on Linux or macOS?
Not as written. The resize step needs Windows GDI+. The header-writing logic is portable if you substitute a cross-platform imaging library such as ImageSharp or SkiaSharp.
How do I add a size that is not in the default list?
Pass it in: Convert-PngToIcon -IconSizes @(24, 48, 96). Anything larger than the source is dropped automatically.
Conclusion
Converting PNG to ICO using PowerShell comes down to one decision. If the icon is disposable, Bitmap.Save with the Icon encoder gets you there in five lines. If a user or a browser will see it, spend the extra twenty lines and write the ICONDIR yourself.
The manual writer is not really image processing at all. It is byte packaging, and once you have the header laid out correctly, it never needs touching again.
Drop Convert-PngToIcon into your profile or a small module, and icon generation becomes one more thing your build script handles quietly. Try it against your own brand folder next, and check the 16px frame in a real browser tab before you ship it.
You may also like:
- How to Move Files from One Folder to Another Using PowerShell
- Find the Most Recent File in a Directory with PowerShell
Bijay Kumar is an esteemed author and the mind behind PowerShellFAQs.com, where he shares his extensive knowledge and expertise in PowerShell, with a particular focus on SharePoint projects. Recognized for his contributions to the tech community, Bijay has been honored with the prestigious Microsoft MVP award. With over 15 years of experience in the software industry, he has a rich professional background, having worked with industry giants such as HP and TCS. His insights and guidance have made him a respected figure in the world of software development and administration. Read more.