
To create a file with content in PowerShell, use Set-Content -Path file -Value 'text'. It creates the file, or replaces its content if the file already exists:
Set-Content -Path C:\psfaqs\Files\welcome.txt -Value 'Welcome to the Austin office!'
Get-Content -Path C:\psfaqs\Files\welcome.txt
Output:
Welcome to the Austin office!Below I cover multiline text, encoding, and JSON and XML files. I ran every example in PowerShell 7.6 and Windows PowerShell 5.1 and show where they write different files.
Write several lines
A here-string keeps the line breaks you type. Start it with @’ on its own line and end it with ‘@ at the start of a line:
$body = @'
Server=SQL01
Database=Orders
Port=1433
'@

Set-Content -Path C:\psfaqs\Files\app.config -Value $body
"Lines written: $((Get-Content -Path C:\psfaqs\Files\app.config).Count)"
Output:
Lines written: 3Use @” “@ instead if you want variables inside to expand. Adding new lines to strings covers `n and here-strings in more detail.
Write an array, then append
Pass an array to Set-Content and each item becomes a line. Add-Content appends more lines later:
$cities = 'Austin', 'Denver', 'Miami'
Set-Content -Path C:\psfaqs\Files\cities.txt -Value $cities
Add-Content -Path C:\psfaqs\Files\cities.txt -Value 'Seattle'

Get-Content -Path C:\psfaqs\Files\cities.txt
Output:
Austin
Denver
Miami
Seattle
Add-Content explains appending, including the missing-newline trap.
Set-Content vs Out-File: the encoding matters
In Windows PowerShell 5.1, Set-Content and Out-File write different encodings. This writes the word Café three ways and checks the bytes:
Set-Content -Path C:\psfaqs\Files\set-content.txt -Value 'Café'
'Café' | Out-File -FilePath C:\psfaqs\Files\out-file.txt
Set-Content -Path C:\psfaqs\Files\utf8.txt -Value 'Café' -Encoding utf8

foreach ($name in 'set-content', 'out-file', 'utf8') {
    $bytes = [IO.File]::ReadAllBytes("C:\psfaqs\Files\$name.txt")
    '{0,-12} {1,2} bytes, starts with {2}' -f $name, $bytes.Length, (($bytes[0..1] | ForEach-Object { '{0:X2}' -f $_ }) -join ' ')
}
Output in PowerShell 7:
set-content   7 bytes, starts with 43 61
out-file      7 bytes, starts with 43 61
utf8          7 bytes, starts with 43 61
Output in Windows PowerShell 5.1:
set-content   6 bytes, starts with 43 61
out-file     14 bytes, starts with FF FE
utf8         10 bytes, starts with EF BB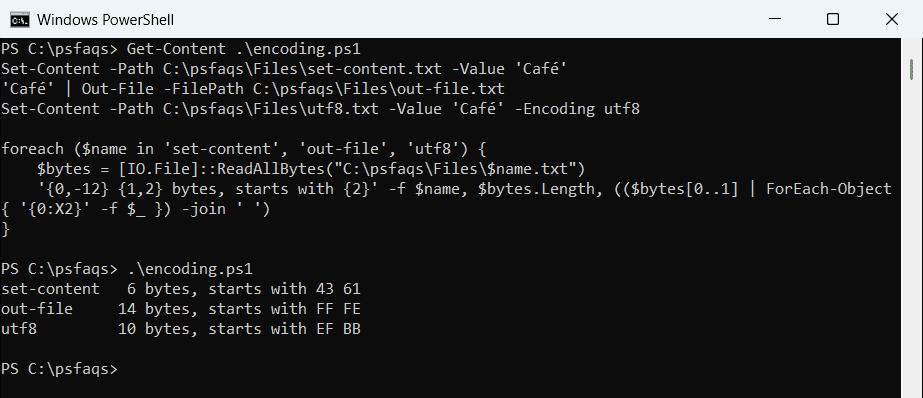
PowerShell 7 writes UTF-8 without a byte order mark everywhere. In 5.1, Set-Content writes ANSI, Out-File writes UTF-16 (FF FE), and -Encoding utf8 adds a BOM (EF BB BF).
Out-File cuts wide tables
Out-File writes objects the way the console would show them, so long values get cut at the console width. Add -Width:
$item = [pscustomobject]@{ Name = 'Contoso'; Notes = ('x' * 150); City = 'Austin' }

$item | Format-Table | Out-File -FilePath C:\psfaqs\Files\table.txt
"Default width keeps all notes:  $((Get-Content -Path C:\psfaqs\Files\table.txt -Raw).Contains('x' * 150))"

$item | Format-Table | Out-File -FilePath C:\psfaqs\Files\table.txt -Width 300
"With -Width 300 keeps all notes: $((Get-Content -Path C:\psfaqs\Files\table.txt -Raw).Contains('x' * 150))"
Output:
Default width keeps all notes:  False
With -Width 300 keeps all notes: True
For data you’ll read back, export CSV or JSON instead of formatted tables.
Create a JSON file
Build an ordered hashtable, convert it with ConvertTo-Json and save it. ConvertFrom-Json reads it back as objects:
$settings = [ordered]@{
    AppName  = 'OrderSync'
    Region   = 'US-East'
    Servers  = 'WEB01', 'WEB02'
    Database = [ordered]@{ Server = 'SQL01'; Port = 1433 }
}

$settings | ConvertTo-Json | Set-Content -Path C:\psfaqs\Files\settings.json
$back = Get-Content -Path C:\psfaqs\Files\settings.json -Raw | ConvertFrom-Json
"Read back: $($back.AppName) uses $($back.Database.Server) on port $($back.Database.Port)"
Output:
Read back: OrderSync uses SQL01 on port 1433[ordered] keeps the keys in the order you typed them, which makes config files easier to read. ConvertTo-Json has more options.
Nested JSON gets cut at depth 2
ConvertTo-Json only goes two levels deep by default. PowerShell 7 warns you, while Windows PowerShell 5.1 silently writes a type name instead of your data:
$config = [ordered]@{ App = 'Orders'; Env = [ordered]@{ Prod = [ordered]@{ Db = [ordered]@{ Server = 'SQL01' } } } }

'Default depth:'
$config | ConvertTo-Json -Compress
'-Depth 5:'
$config | ConvertTo-Json -Compress -Depth 5
Output in PowerShell 7:
Default depth:
WARNING: Resulting JSON is truncated as serialization has exceeded the set depth of 2.
{"App":"Orders","Env":{"Prod":{"Db":"System.Collections.Specialized.OrderedDictionary"}}}
-Depth 5:
{"App":"Orders","Env":{"Prod":{"Db":{"Server":"SQL01"}}}}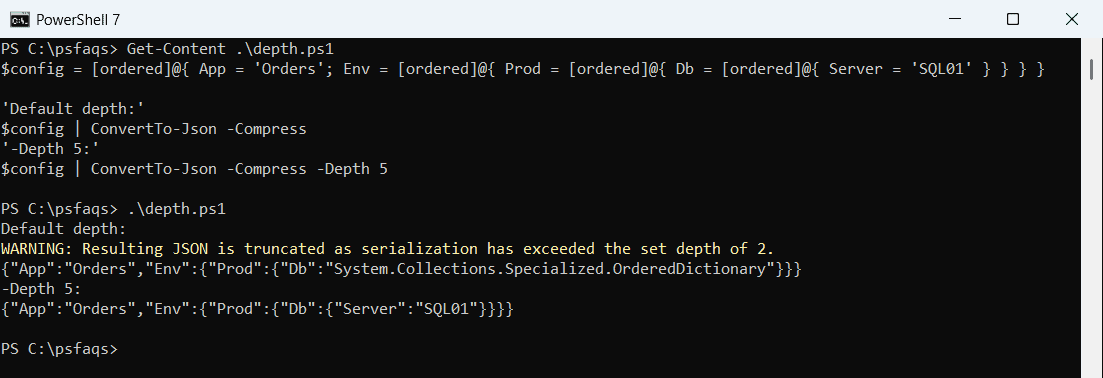
5.1 prints the same truncated JSON without the warning. Add -Depth whenever your data is nested, as the ConvertTo-Json documentation explains.
Create an XML file
For a fixed layout, cast a here-string to [xml], change what you need and save it. Pass Save() a full path:
[xml]$doc = @'
<settings>
  <app name="OrderSync" region="US-East" />
  <database server="SQL01" port="1433" />
</settings>
'@

$doc.settings.database.port = '14330'
$doc.Save('C:\psfaqs\Files\settings.xml')

[xml]$saved = Get-Content -Path C:\psfaqs\Files\settings.xml -Raw
"Saved port: $($saved.settings.database.port)"
Output:
Saved port: 14330Save() is a .NET method, so a relative path would land in the folder PowerShell started in, not your current location. New-Item explains that difference.
Build XML from data
When the elements come from a list, create them with XmlDocument:
$doc  = New-Object -TypeName System.Xml.XmlDocument
$root = $doc.AppendChild